
Moving home can be so all-consuming that seemingly small things – such as labelling boxes – can fall by the wayside. But labelling your moving boxes can make a huge difference to your life when it comes to moving day.
Read on to find out how to label your boxes properly.
Labelling your boxes can benefit both you and your removal company.
Moving box labels will help your professional movers to understand which boxes need to be loaded first and where to put them once they’ve been unloaded from the van.
It’ll also make your life a whole lot easier when you come to unpack.
It’s also vital to label fragile items so that you and your removal company know to take special care when handling them.
There are a few different ways to label boxes – choose the one that suits you best.
Before you start thinking about what to put where ensure you have all your packing and labelling materials in order.
Here’s a quick rundown of what you’ll need for box labelling:
There’s no size-fits-all approach to organising moving labels for boxes, but there are some tried and tested methods you can adapt to suit your needs and preferences.
We’d highly recommend that you make an inventory of the things you need to pack and move. We’d also suggest doing this digitally and saving a copy on the cloud – if you do it by hand, you risk losing the piece of paper.
Keeping an inventory will make it easier for you to track missing items. Write down all the items you need to pack, one room at a time. When you pack it, tick it off the list and write down which box it’s in (use the colour or number method as explained below).
It might seem a little silly, but it is a must to know when to label your boxes. The general rule is this: don’t label your box before you’ve packed it. It can be tempting to label a box to fill it with your belongings later on but don’t.
Similarly, avoid labelling your boxes hours or days after you’ve packed and sealed them. With so much going on, there’s no way you’ll remember what’s inside. The best time to label a box is straight after you’ve packed and sealed it with strong packing tape.
You might decide to go down the colour-coded boxes route when labelling your moving boxes. This labelling system is especially popular with visual thinkers and works like this:
Try the super simple numbering approach if colour coding isn’t for you. Both approaches work well whether you’re moving straight into your new place or are planning to place your items into a short-term storage facility first.
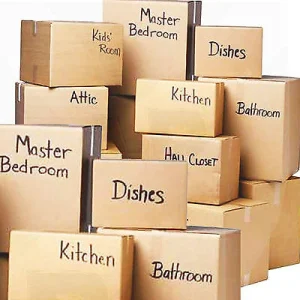
Just write a number on the box and the room it belongs in.
For example, Box 1: living room; Box 2: loft; Box 3: spare bedroom, and so on.
Be sure to label the box number after each item on your inventory list; if you organised your inventory list on a room-by-room basis, even better!
Pro tip: Label or number each box on the top and at least one side so that its exact destination is visible when the time comes for you to unpack.
Fragile items need a little extra TLC to minimise breakage risk.
Be sure to wrap each item individually with extra paper or bubble wrap before placing it in the box. Use bubble wrap or old fabrics (e.g. towels) to fill any gaps.
As well as colour coding or numbering your boxes that contain fragile items, put a label on each side of the box that says: FRAGILE: HANDLE WITH CARE”.
You should also indicate which side of the box should face upwards. This will remind you and your moving company to move the box with extra care and avoid getting them wet or dirty.
It’s highly unlikely that you’ll do all your unpacking the day you move.
That’s why it’s always a good idea to prepare a “priority box” that you can open on the first night in your new home. This could contain essentials or things to make you feel at home. While we can’t tell you exactly what to pack, here are a few ideas:
Again, don’t forget to label your priority box with what’s inside!
If you’re looking for house removals help, you’ve come to the right place.
Our team can help you with the entire removals journey, from the packing process and home moving to storing and unpacking.
We’ll help you pack and label your cardboard boxes, so you don’t have to do it alone. We use recyclable and reusable packaging materials wherever possible and even provide packing and storage services for artwork, IT equipment and big musical instruments like pianos.
As well as a removals service, we can provide you with a storage solution should you need it. We pack smartly to minimise the amount of storage space you need to pay for, and our storage units are available to rent on a flexible, month-by-month basis.
Let us know when you need your items back, and we’ll deliver them to your new hom